Summary
In this blog post I’m going to show you how you can grab a live data feed from ReSpeaker on Raspberry Pi, put that into influxDB and then finally query and visualise the data using Grafana.
Setting up ReSpeaker on the Raspberry Pi
Having just picked up a brand new ReSpeaker 4 mic array I needed to try it out:
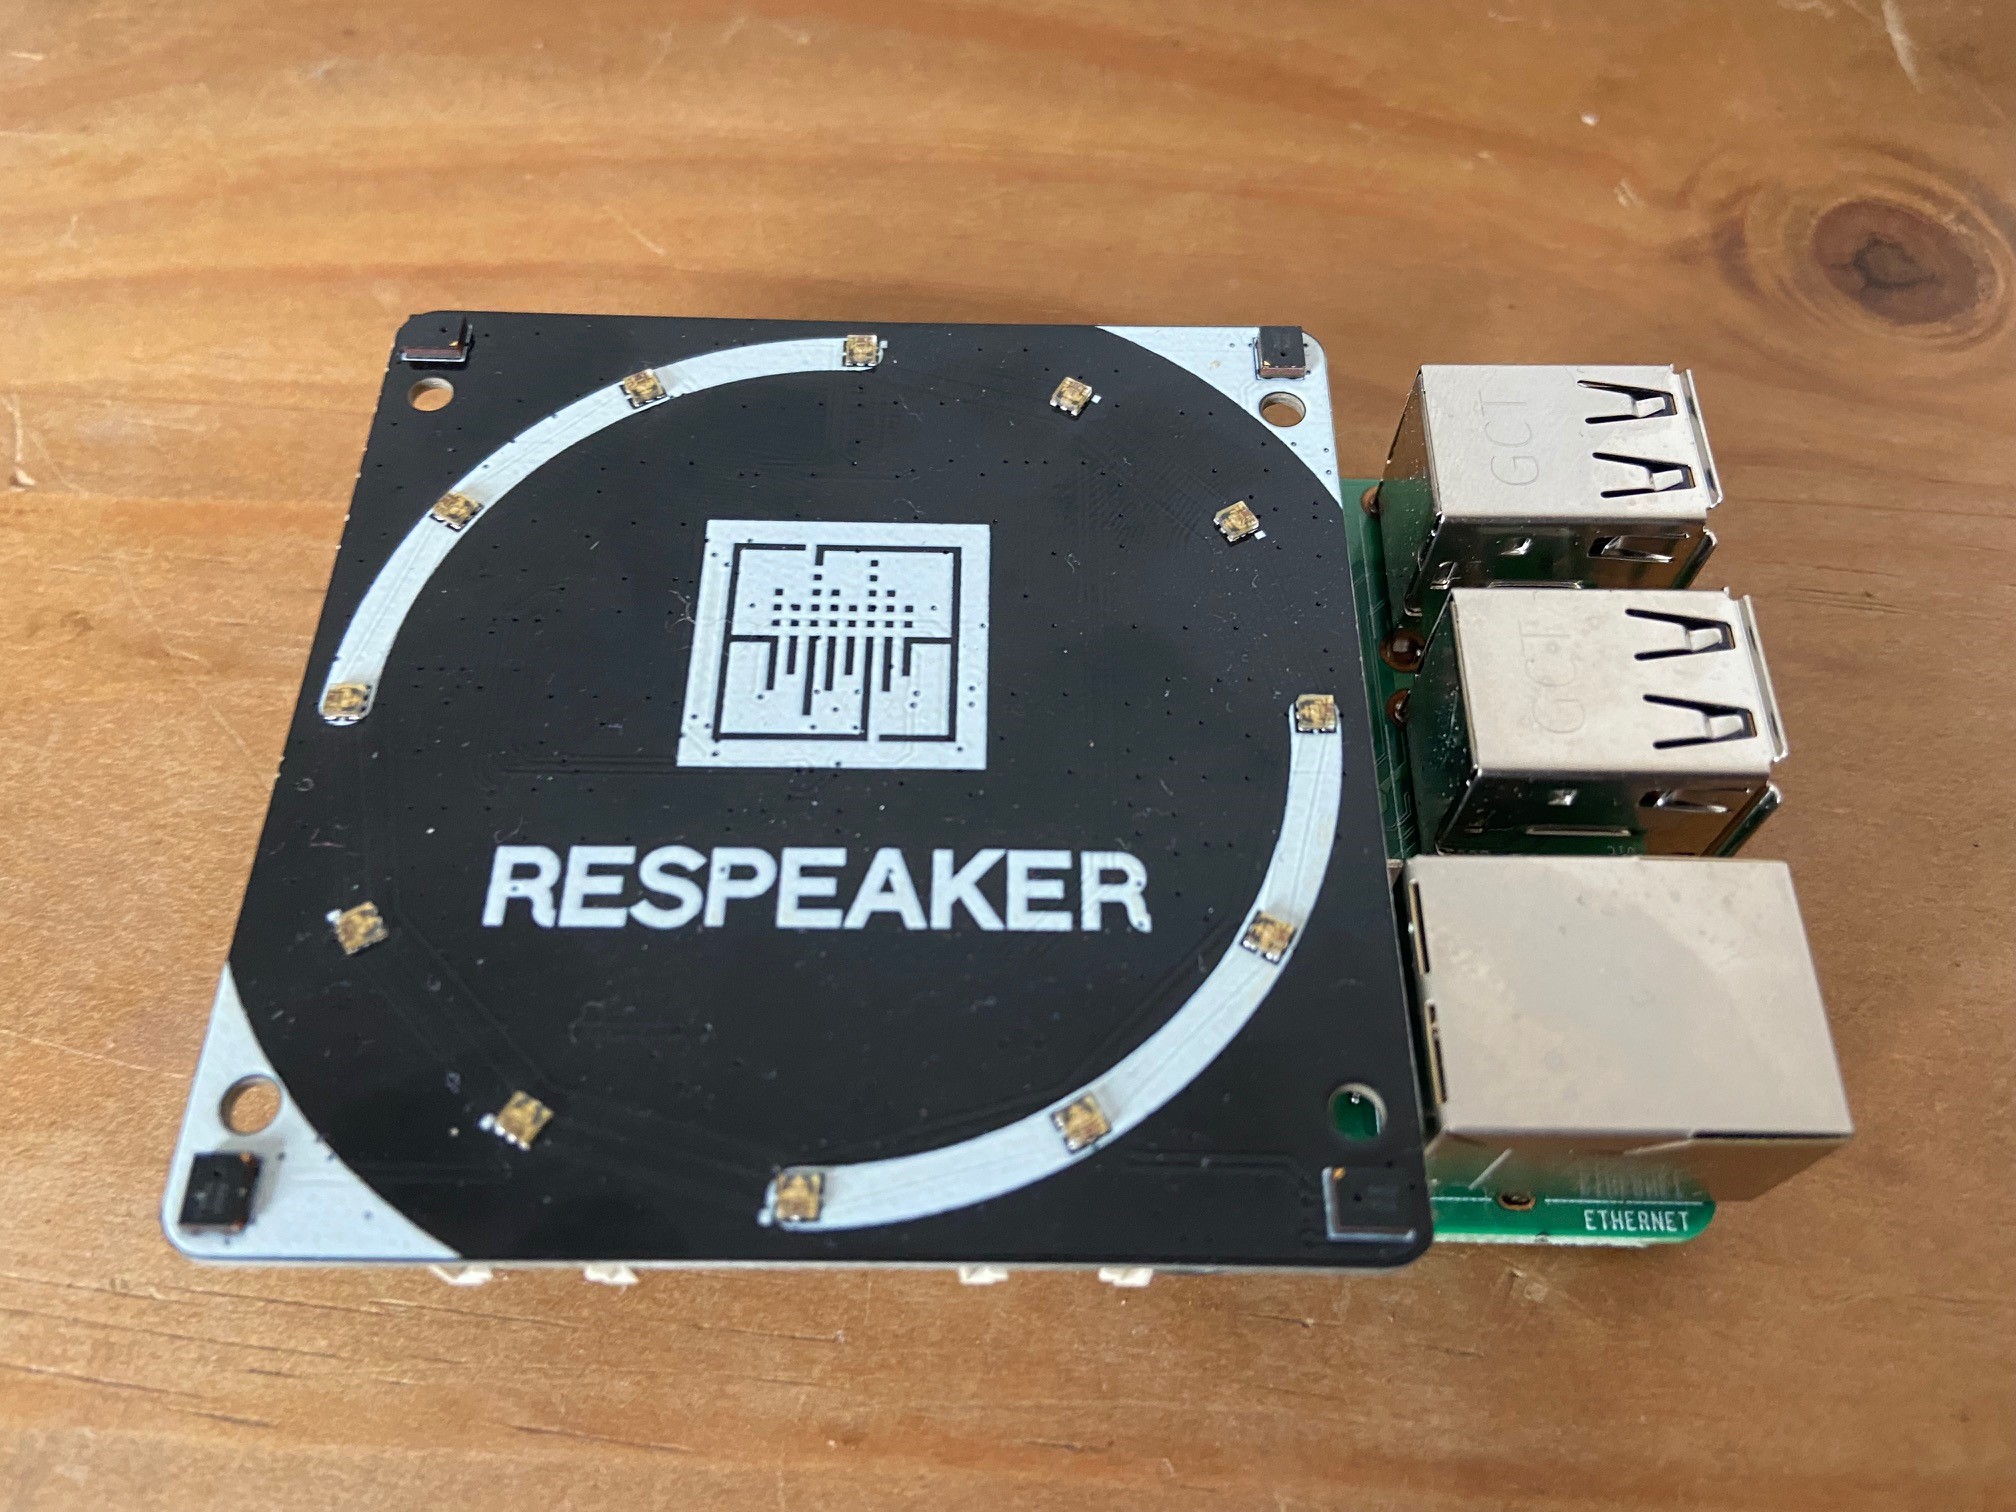 ReSpeaker 4 mic array for Raspberry Pi
Having followed this helpful tutorial I managed to install the drivers required for the connectivity via the GPIO pins on the Pi.
Once I had done this, I installed ODAS which is a helpful FOSS for audio tracking, localisation and seperation. https://github.com/introlab/odas
Using the following commands you can very quickly build odas for the Pi:
sudo apt-get install libfftw3-dev libconfig-dev libasound2-dev libgconf-2-4
sudo apt-get install cmake
git clone https://github.com/introlab/odas.git
mkdir odas/build
cd odas/build
cmake ..
make
Once make has been run, this will create two exectuables within the odas/bin folder: odaslive odasserver
Now we can move onto configuring the odaslive in order to get the data via raw TCP to a python script.
Configuring ODASLive to send raw data to Python over TCP
Upload the following configuration file to the Raspberry Pi, to the odas base folder: Odas live config
Now that the configuration file is sitting on the Raspberry Pi, we can check to see if odas is configured properly.
run the following command:
./odaslive -c ../odasliveconfig.cfg
If odas has been installed succesfully, you should see the following error:
Sink pots: Cannot connect to server
This means that odaslive is able to send data but there is no server to receive the packets.
Next we need to install InfluxDB on the Raspberry Pi. This is as simple as running the following commands:
Add the InfluxDB to the apt install repository.
wget -qO- https://repos.influxdata.com/influxdb.key | sudo apt-key add -
Add the repo to the sources list for apt
echo "deb https://repos.influxdata.com/debian buster stable" | sudo tee /etc/apt/sources.list.d/influxdb.list
Update the package list
sudo apt update
Install InfluxDB
sudo apt install influxdb
Now, run the following commands to unmask, enable (so it starts on boot) and start the InfluxDB service.
sudo systemctl unmask influxdb
sudo systemctl enable influxdb
sudo systemctl start influxdb
We can now install the python pip library to allow us to communicate to the InfluxDB service running on the Pi with the following command:
python3 -m pip install influxdb
Finally copy the following Python script from the following link to an accessible location on the Pi:
https://raw.githubusercontent.com/AaronMulgrew/respeaker-influxDB/main/server.py
Once we are at this point, we are good to go.
Run the following commands in seperate terminal sessions to the Pi to see some data moving from odas to the python server and finally into InfluxDB:
python3 server.py


./odaslive -c /path/to/odas/odasliveconfig.cfg
If it worked as expected, on the Python server you should see the following:
starting up on localhost port 9001
waiting for a connection
connection from ('127.0.0.1', [random port no])
You are safe to kill the odas process [ctrl + c] and the Python server.
To verify that some data has indeed made it to InfluxDB, you can run the following command to get us into the InfluxDB shell:
influx
The InfluxDB shell, is powerful for running commands for both development and test. More information is available here
Now, type the following to use the database and extract the sample data: use python_timeseries SELECT * FROM noise LIMIT 3
You should see an output along the following lines:
time                Avg Mic1  Mic2  Mic3  Mic4  host
----                --- ----  ----  ----  ----  ----
1619532326000000000     0.189 0.166 0.137 0.076 server01
1619532327000000000     0.174 0.123 0.062 0.057 server01
1619532328000000000     0.182 0.11  0.101 0.081 server01
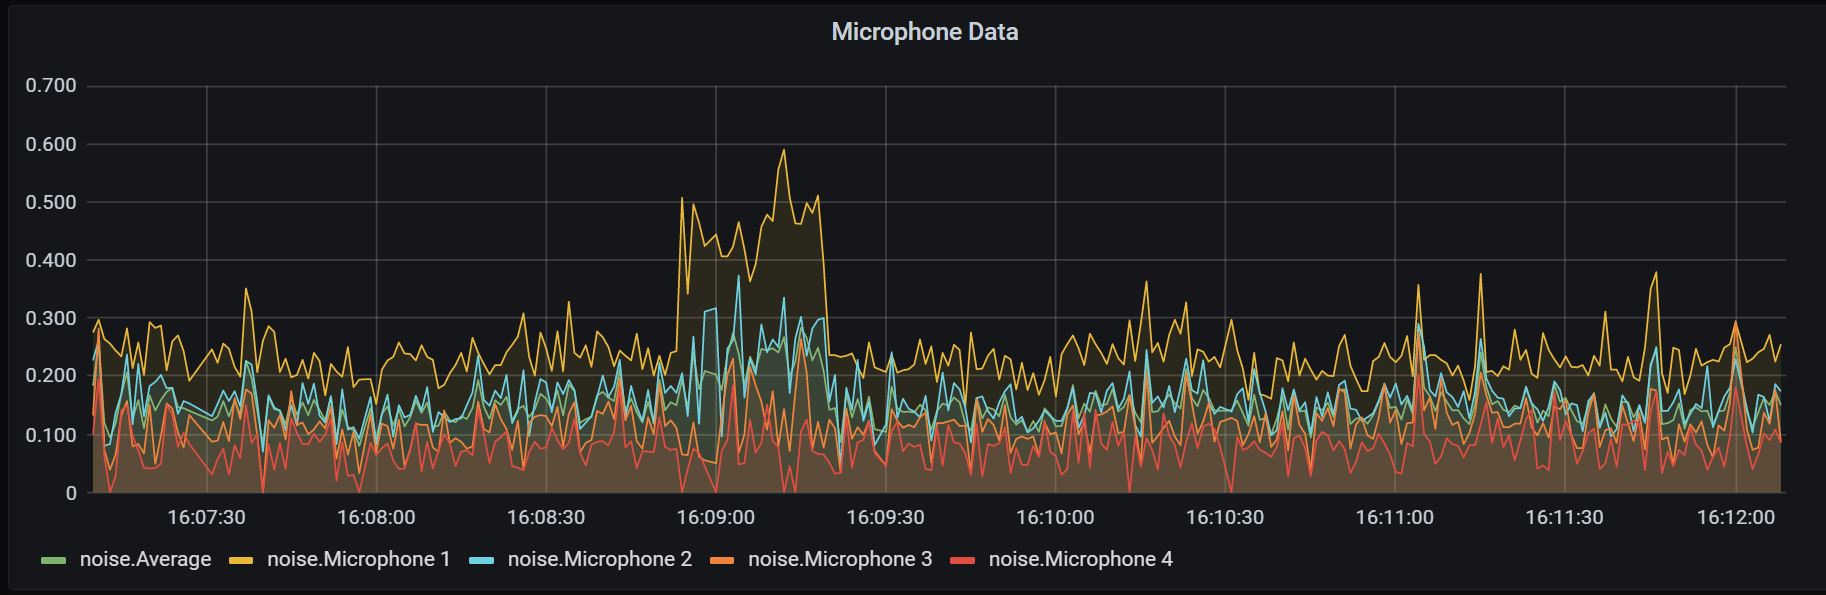
This is the raw energy output from each individual mic, alongside an overall average.
At this point we have done the following:
- Installed ODAS for the raw microphone data decoding
- Installed both InfluxDB on the Pi and the Python3 library
- Ran the Python script successfully and checked that there is some data in InfluxDB
Installing and configuring Grafana to talk to the Pi
The final task in this tutorial is to connect Grafana to talk directly to the Pi over the LAN (wifi or ethernet).
I have found that Grafana can consume a lot of resources at times, so it is best to install this on the host PC or an alternative server which has more processing power.
Installing Grafana is as simple as downloading the installer for Windows/MacOS available here
Once the installer has run just navigate to https://localhost:3000 where the default username/password is admin/admin.
Now, we just need to configure our data source, InfluxDB. Navigate to the data sources column within Grafana:
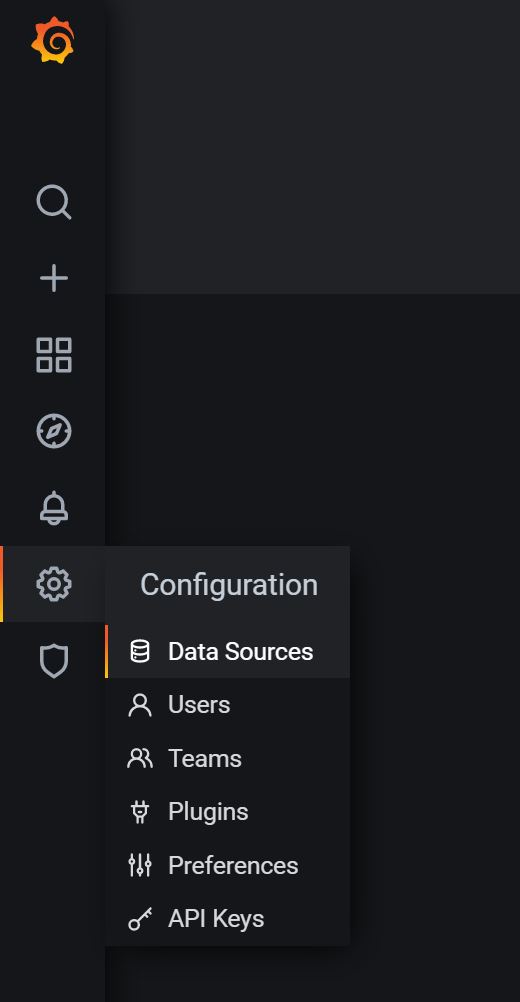 Data sources column in Grafana
Select ‘Add Data Source’ and search for ‘InfluxDB’. Select ‘configure’ with the following configuration values:
URL: [Local IP of Raspberry Pi]:8086
database: python_timeseries
Leave all other entries as default and click ‘Save & Test’. This will verify there aren’t any firewalls blocking the connection and the InfluxDB service is running as expected.
Start the server and client on the Pi back up in seperate terminal sessions:
python3 server.py


./odaslive -c /path/to/odas/odasliveconfig.cfg
We are now at the point to import the Grafana dashboard to see the live Microphone data feed.
Import the following JSON file to see a real time dashboard in Grafana:
Click on manage under dashboards on the Grafana homepage:
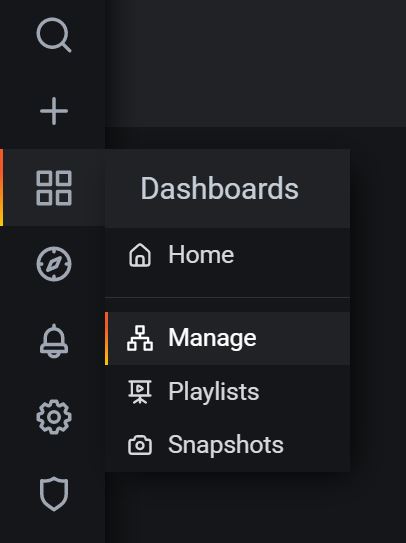
Click ‘import’ and finally paste the contents of the JSON file into the box under “Import via panel JSON”.
If this works as expected, you will now see a dashboard under ‘dashboard -> manage’. Click on the dashboard and you will see the live Microphone data as below:
Closing Comments
I hope you enjoyed this tutorial on configuring a ReSpeaker to talk to InfluxDB via Python. If you have any issues please reach out to me by opening an issue on my github repo available here:
https://github.com/AaronMulgrew/respeaker-influxDB
We recommend only following this tutorial for experimentation, rather than running this in any kind of production scenario. To ‘bulletproof’ this for production would require modification such as closing out the authentication to the InfluxDB database and ensuring resiliency for the Python script provided.
Thanks!